Showing posts with label cheese. Show all posts

Wednesday, 22 August 2012

Poutine


It's been a few weeks! I was off on a lovely little family vacation to Alberta for a family reunion on my hubby's side. Then, we came home and moved. Right away. It's been busy busy busy! It's been a really fun summer, but let me tell you, I am very happy to turn in the camp stove and hot dog roasters and get back to a real kitchen! My new kicthen, which has a gas stove and a convection oven. I know. I can't keep out of there.

 Last week, just after we got settled, Leah and her brood came for a visit so we decided to make an awesome "meal" for the kids. And by the kids I mean we made it for us, and then felt bad and were forced to share.

We are Canadian. I think that may have been mentioned before. There don't seem to be a lot of strictly Canadian foods, seeing as how our great country is relatively new, and really a great  big melting pot. I love it, it's what makes our country so diverse and interesting.

However, there is one food that is pretty much to die for, and 100% Canadian baby. French Canadian. This dish originated in Quebec, and made it's way across the country. It's called Poutine. For those of you south of the border, this is pronounced "Pooh-teen". And it's amazing.

Traditionally, poutine is made with cheese curd, but we used mozzarella instead for 2 reasons. I had some in my fridge already, and cheese curd is hard to find and can be pricey.

You can use whatever cheese you like, depending on how strong of a cheese flavour you want. I think the best are of course the traditional curd, mozzarealla, monterey jack, havarti, or pepperjack.
Try to invite some people over when you make this, because otherwise you might be tempted to eat it all by yourself, which you might regret later. Maybe.

Poutine

6 russet potatoes (I think these make the best fries)
2 tsp fresh minced garlic
salt, to taste
3 tbsp olive oil
1 pack of brown gravy mix
1-2 cups shredded mozzarealla cheese

  • Preheat oven to 450 degrees
  • Wash potatoes and slice into french fry sized strips
  • Put in a large stainless steel bowl and toss with garlic, salt and olive oil
  • Spread on a parchement paper lined baking sheet and pop in oven for 15-20 minutes, until soft and slightly crispy. (I do them less crispy than I would if I were just going to eat them by themself, you will want these ones to be a bit softer, because you eat this with a fork.)
  • In the meantime, while they're in the oven, prepare your gravy according to the instructions on the packet.
  • Grate your cheese.
  • When the fries are done, put them immediately into individual bowls, smother in gravy, and top with cheese. It will melt as you eat it.
  • Try to share, if you have it in you.


-Jessica and Leah


Friday, 20 April 2012

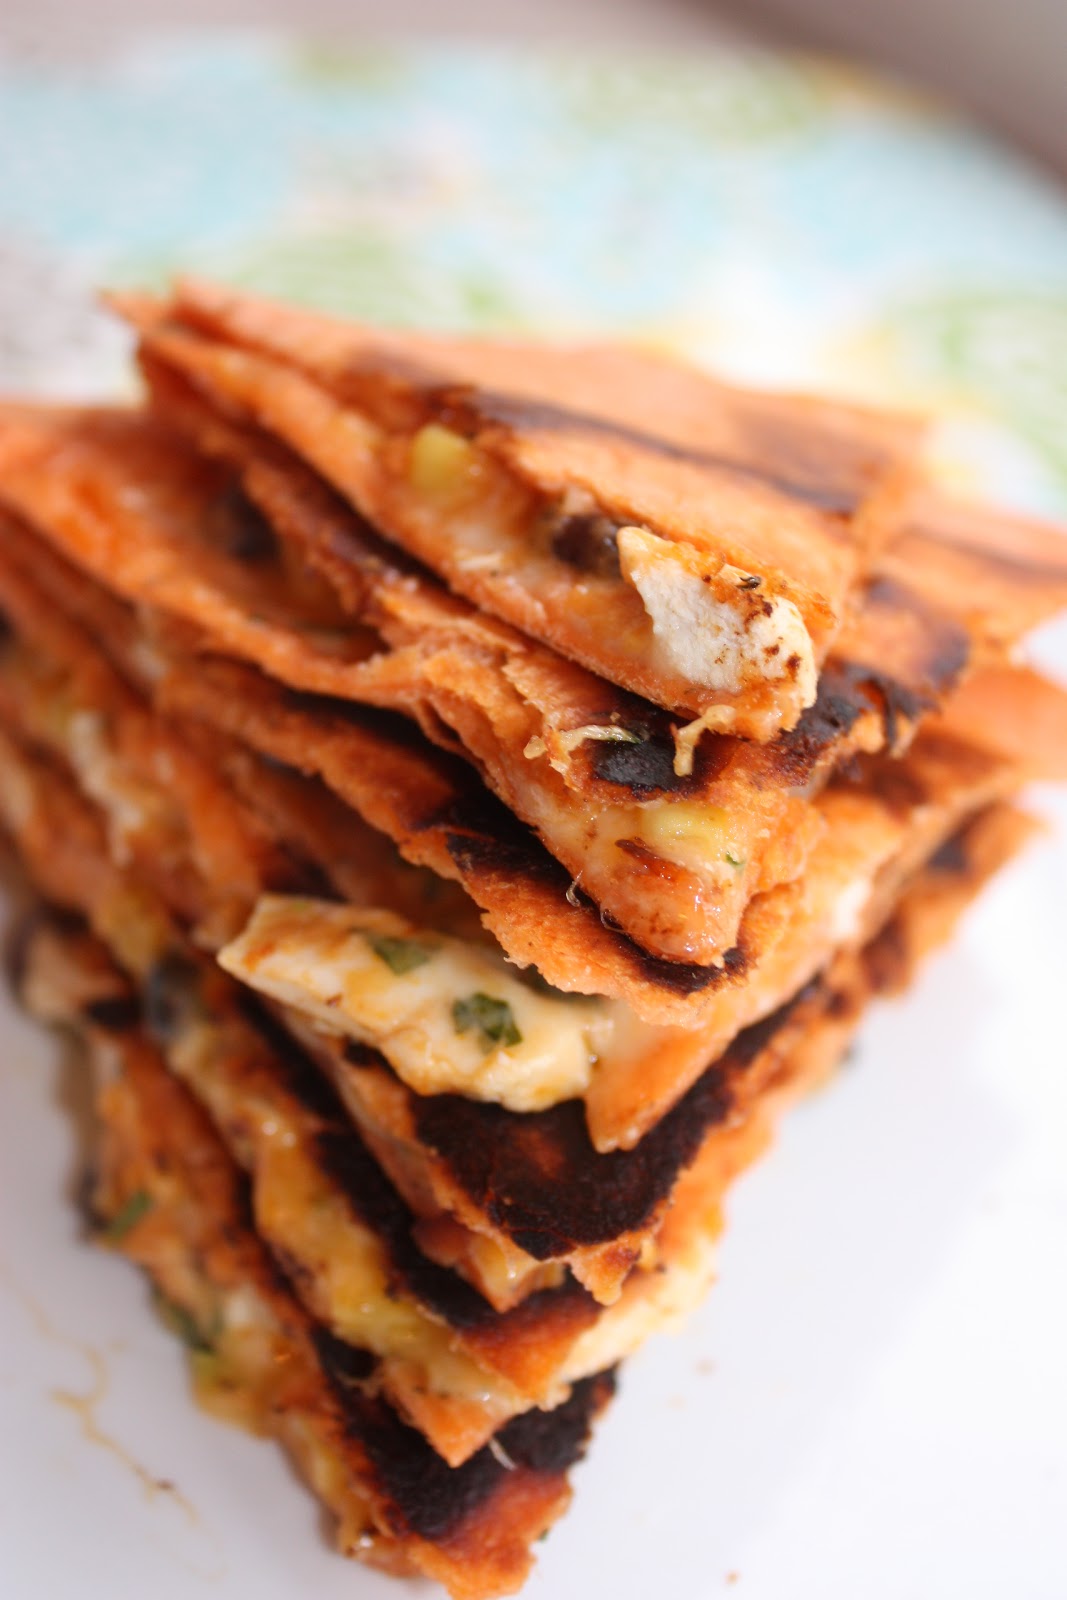
Black Bean and Corn BBQ Quesedillas with Cilantro Lime Sour Cream


Sometimes I wish I had someone who could suck all the creativity out of my brain and write it out for me so I wouldn't have to. Does your mind ever draw a blank, although, somewhere in there, there's an entire encyclopedia full of things just waiting to be put into words? This is all I have today:

These are good. Really delicious. If you don't make them, you will be missing out on a fab meal.
The End.

Black Bean and Corn BBQ Quesedillas with Cilantro Lime Sour Cream

6 flour tortillas (I used sun-dried tomato)
2 cups of cooked chicken, cut into bite-sized pieces (I cheated and bought a grocery store rotisserie)
I small can of niblet corn
1 small can of black beans, drained and rinsed
1  1/2 tbsp mayonnaise
1/2 cup your favourite BBQ sauce
small handful of cilantro, diced
2 cups grated cheddar (I used a mix of sharp and white extra-sharp)

for the sour cream:
2/3 cup sour cream
1 tsp lime juice
1  1/2 tbsp cilantro, diced

  • Combine mayonnaise and BBQ sauce in a small bowl.
  • Spread sauce onto one tortilla.
  • Layer on your chicken, corn, beans, cilantro and cheese (make sure cheese is on top)
  • Put another tortilla on top to make a quesedilla and transfer to a hot, buttered frying pan.
  • Cook on medium until cheese is almost melted and flip.
  • Finish cooking, transfer to cutting board and let cool for about 3 minutes. Cut into triangles.
  • To make the sour cream, simply comine lime juice, cilantro and sour cream.


-Jessica


Thursday, 19 April 2012

Avocado Chicken Parmigiana


I can't believe there was ever a time when I didn't like avocado. It's a part of my past I'm not proud of, okay? Let's call it my teenage rebellion. But, like most rebellious teens, I got over it. In a big way. I am crazy for avocado. Like cray-zee. They are so creamy, tasty, versatile and full of awesome-ness. Good for you. Got it? Avocodo=good.

Now that we're on the same page, you should probably make this for dinner. It's a yummy, summer-y take on an old classic. I served it with a fresh garden salad (full of avocado, of course).

Avocado Chicken Parmigiana

4 boneless, skinless chicken breasts
2 eggs
1/4 cup milk
Salt and pepper
3/4 cup all purpose flour
1 cup panko bread crumbs
1/4 cup parmesan chesse
1 cup tomato pasta sauce
2 ripe avocados
3/4 cup grated extra-old white cheddar cheese


  • Preheat your oven to 375 degrees ferenheit.
  • Using a kitchen mallet (or in my case, the back of an ice cream scoop), pound your chicken to make it flatter.
  • Combine eggs, milk, and salt and pepper and set aside.
  • Combine panko and parmesan cheese and seat aside.
  • Line a baking dish or cookie sheet with foil and spray with non-stick coating.
  • Coat chicken in flour, dip in egg mixture, and coat in panko mixture.
  • Place chicken on baking sheet and put in oven for 20 minutes, or until chicken is almost cooked through.
  • Remove from oven and top with 1/4 cup tomato sauce, strips of avocado, and grated cheddar.
  • Put back in the oven for 15 minutes, turning your oven on to broil for the last 3.


-Jessica

Friday, 27 January 2012

вареники (Ukrainian Perogies)


See that girl up there? That's Leah. This is her with her Ukrainian dance group at a competition when she was about 15. We all danced, but Leah is our favourite one to reminisce about make fun of. Was Leah good at Ukrainian dancing? Heck no. Is she good at Ukrainian cooking? You better believe it.

We are Ukrainian, through and through. Our Mom's parents immigrated to Canada just a few months before she was born. She didn't even speak English until she started elementary school. We grew up with a huge Ukrainian influence in our home, which is pretty much translated into food. Our favourite of which is Varenyky (or perogies, as you probably know them).

Last week,  Jessica was visiting Leah in Seattle and we realized that because of the miles between us, we had never (as adults) actually made them together. With the incoming snowstorm we knew we would be stuck in the house, so the timing seemed perfect.

This recipe will yield about 200 perogies. Just to give you an idea, if you are making dinner for 4 people, you will probably want about 30.


Varenyky (Perogies)

FILLING:
  • 5 pounds of russet potatoes
  • 1 big onion
  • 1/2 cup butter, divided
  • 4 cups shredded sharp cheddar cheese
  • 2 tsp salt

DOUGH:
*These are the ingredients for ONE batch of dough- if you are making this much filling, you will need about 3 batches, but don't make them all at once. 
  • 4 cups all-purpose flour  
  • 1 cup potato water
  • 1/2 cup vegetable oil
  • 1 tsp salt


DIRECTIONS:

 Peel and quarter your potatoes, and boil just like you would if you were making mashed potatoes.


Chop up your onion and sautee it in 1/4 cup of the butter, until it's transluscent.


When your potatoes are soft, drain them, but KEEP the water! The easiest way is to put your colander into a stainless steel bowl, like this.


Add the cheddar cheese, sauteed onions, 1/4 cup of butter, and salt. Put a lid on and let it sit for 5-10 minutes to let the cheese and butter melt. Take the lid off and mash away. We like to start with a potato masher until it's all mushy, and then take a hand-held mixer to it. Try to resist the urge to just eat the filling by itself. Ok, you can sneak just a bit.


Now is when you make the dough. You need to do it in 3 batches for a few reasons. It's a somewhat stiff dough. so if you make it all at once, it will be too hard by the time you get to the end of it. Also, you want the dough warm when you work with it (which it will be from the potato water).

Put the flour, oil, salt, and reserved potato water in a large bowl, and knead with your hands. Work until you form a large ball.


Roll out your dough with a rolling pin until it's about this thick.


Using a biscut cutter (or a glass, if you don't have a biscut cutter), make circles.


Here's where it gets fun. Spoon about 1 tbsp worth of filling into the middle of a dough circle.


Close the circle into a half-moon shape and pinch along the edges. And I mean really pinch. You don't want it to open when it's cooking.


Have a cookie sheet ready and sprinkled with flour. Put the finished perogies on the sheet. If you're planning to freeze and save your perogies, stick the cookie sheet right into the freezer once the cookie sheet is full.


Once frozen, put into a large ziplock freezer bag until you're ready to cook them, unless you're going to eat them right away.


Get some salted water at a good boil. Put in your perogies, one by one (they splash!). You will know they're ready when they float at the top. Let them float for about 1 minute before taking them out. You can use a colander or a slotted spoon. Serve with a dollop or sour cream and fried onions.


Although not traditional, our favourite way is to fry them (in more butter, of course) after they have been boiled. But you really can't lose either way.


-Jessica and Leah