Thursday, 25 October 2012

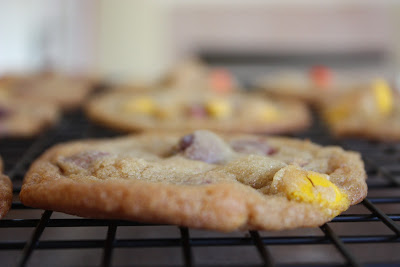
Reese's Pieces Cookies


Here, in lovely little Victoria, it gets wet. In the fall, winter, and spring, I mean. Literally speaking, I own sandals and boots. No need for in-between footwear.

If we ever catch a glimpse of clear sky, we run with our children to the park as fast as we can before the clouds come back.

Maybe to you it sounds dreary, but I was born here. I love it. It's cozy and crisp. And beautiful. And, since we have a lot of time to kill indoors, I get a whole lot of baking done.

We had a Halloween party last weekend and were therefore stuck with a bunch of leftover Reese's Pieces. Pretty much an awesome leftover. Know what makes them more awesome? Put them in cookies. Trust.


These are ridiculous. I'm serious, people. I thought it would be just like a regular chocolate chip cookie, but it's so, so much more. For some reason, the reese's pieces turn the dough into an amazing, chewy but soft but crispy cookie all at the same time. They get all golden and flat (and if you ask me, flat cookies are the bomb). Betcha can't eat just one  five.


Reese's Pieces Cookies

3/4 cup sugar
3/4 cup brown sugar
1 cup butter
2 tsp vanilla
1 egg
1 tsp baking soda
2 1/4 cup all purpose flour
1/2 cups reese's pieces


  • Preheat oven to 375 degrees ferenhiet
  • Combine sugars, butter (use the real deal, folks) and egg in your mixer using cookie paddles
  • Add vanilla
  • Add flour and baking soda until combined
  • Add reese's pieces 
  • Drop by rounded spoonfulls onto a cookie sheet lined with parchment paper (it really makes all the difference) 
  • Bake for 8-10 minutes, or until very lightly browned on top
  • Remove from oven and cool on wire rack


-Jessica


Wednesday, 3 October 2012

Pumpkin Biscoff French Toast with Maple Cream Cheese Syrup


If you're thinking, "There's no way it will actually taste as good as it looks and sounds", you're wrong. Wronger than wrong. In fact, somehow it tastes better. My first bite I litereally said "Oh my gosh!" so loud that all the kids came running in to see what was the matter.
 
Pumpkin? Good. Biscoff? Good. French Toast? Goooooooood. You get the picture. The best way to eat this is on a frosty morning with big fat slippers, a steaming mug of cocoa, and a sister to play cards with. At least, that's what we did and it was a pretty perfect morning.
 
Pumpkin Biscoff French Toast with Maple Cream Cheese Syrup
    
     For the toast:
3 eggs
1/2 cup pure pumpkin puree
1/2 cup milk
1 tsp vanilla
1 tsp pumpkin pie spice
1 loaf french bread, sliced about 3/4 inch thick
 
Beat all of your ingredients together (minus the bread) until nice and frothy. Turn on a griddle or stove to about medium heat and let it get hot for a minute. Dip your bread in the mixture and coat well on both sides. Fry those babies up, a few minutes on each side. (Watch it, every stove is different. This is not yummy burned.)
 
     For the syrup:
8 oz cream cheese at room temp
1 cup pure maple syrup
1/2 tsp cinnamon
 
Beat it and beat it good. Give it a few minutes and voila! You're got one tasty syrup on your hands.
 
     A handful of biscoff cookies, crushed up nice and small. This is it for the topping. Why mess with a good thing?
 
Stack your toast, douse with syrup, and sprinkle with cookies.


-Jessica and Leah


Thursday, 6 September 2012

Caramel Cinnamon Applesauce


Sorry to everyone whom I may offend by saying this, but....I am super excited for fall! Not that I don't love summer, but there's something about fall that makes me really happy. Let me make you a top 10  list.  What, you don't care about my list? Too bad. I like lists.
 
1.  Leaves. I love the colours of all the different leaves and there's something so satisfying about stomping in a pile of really crunchy ones. And here in Victoria, we have an abundance of beautiful, leafy trees. Love it.
 
2.  Sweaters. There's not much cozier than putting on a soft, warm, cozy sweater right after getting out of the shower. It makes my day.
 
3. Boots. Sadly, my hubby is not a big fan of boots, but I don't really care. I love them. They're adorable, comfy, and totally practical.
 
4. Hallowe'en. I love this holiday. Any reason to decorate is welcome, of course, but beyond that I think it's just plain fun. Kids get so excited to put on their costumes, and there's usually a party or two. Also, I have a super fun Hallowe'en music mix that I put together for my kids....I mean how often do you get to listen to "Ghostbusters" and "Thriller" without feeling like a dork.
 
5. Pumpkin carving. Unfortunately for me, my hubby and my sister are artists, and me not so much. Their jack-o-lanters are pretty amazing. I'm just lucky if I don't cut my finger. But it's good fun.
 
6. Hot chocolate. I would drink it every day if it were cool enough, calories and all. I love it so much. It just feels wrong when its 25 degrees outside, but starting in September I say bring it on.
 
7. Fall was my mom's absolute favourite season. Every little bit of fall reminds me of her.
 
8. Fall lotion and candles. It's true. My very favourite store is bath and body works. In fact, I think I might be addicted. When I moved in August, I found a bag with 11 containers of soap. I kind of hoard it. Anyway, the fall stuff is the best. Really.  
 
9. Caramel Apples. When I was a kid we did it every year. I swear it took hours just to get the stupid plastic wrappers off the little caramels, but it's so worth it.
 
10. Applesauce. I'm not one to eat apples by themself (unless it's a McIntosh, I love those). But in sauce, I can't get enough. The smell is amazing, it's so smooth and sweet and spicy, and it's good cold, warm, or even on vanilla ice cream. Mmmmmmm.
 
 
Caramel Cinnamon Applesauce
 
  • 12 apples (I used a combo of granny smith and gala, just what was in my fruit bowl)
  • 1/4 cup water or apple juice
  • 1/4 cup sugar
  • 2 tsp cinnamon
  • 1/2 tsp nutmeg
  • 2 tbsp caramel sauce (I just used the smuckers ice cream topping)


I have one of those handy dandy apple peeler things, which cuts the time in half. If you don't, use a potato peeler, or sharp knife and peel those apples.
 
Then core and slice them, and throw them into a nice big pot.
 
Add the water and simmer on low heat for about 20 minutes.
 
After 20 minutes, check the softness with a fork or potato masher. You may need to turn up the heat a little, depending on your stove.
 
Once they are very soft, add the sugar, cinnamon, nutmeg and caramel. Mash a bit with the masher, and then puree it using an immersion blender. I love that thing. If you don't have one, you could transfer it all into a big blender, or just mash until you're satisfied with the size of apple chunks. I don't mind chunks, but my kids hate 'em.
 
Let in cool in the pot, unless you're eating it right away. Once cool, transfer it to a jar, bowl, tupperware, whatever you want.
 
This recipe got me one extra large and very full mason jar (not the standard size, bigger).


I hope you love fall as much as I do!
 
-Jessica


Tuesday, 28 August 2012

Peanut Butter Brownie Fudge Ice Cream


What do you do when your sister is visitng, there are 7 kids running around the house, and its over 30 degrees (celcius...that's like 85 or something in ferenheit). Well, you do pretty much nothing.
 
Maybe spend the afternoon playing board games (scattergories anyone?), reading Divergent (trust me, read it) and playing Harry Potter 20 questions. It's fun, I swear. Especially if you're nerdy like us. It was hot, okay?
 
At some point we decided that we should probably get some food in the kids. My mom-in-law recently bought an ice cream maker and I was dying to get my hands on it. And what sounds better in sweltering heat than some homemade, creamy and cold ice cream. Not much, to be honest. This may or not have been dinner.
 
 
Peanut Butter Brownie Fudge Ice Cream
 
(the base ice cream recipe was from the Cuisinart ice cream maker recipe book)
 
1 cup unsweetened cocoa powder (Dutch process preferred)
2/3 cup granulated sugar
1/2 cup firmly packed brown sugar
1-1/2 cups whole milk
3-1/4 cups heavy cream
1 tablespoon pure vanilla extract
1 batch of brownies (minus the caramel and skor bits) 
1/2 cup peanut butter
1/2 cup hot fudge (I like the smuckers brand)


  • Place the cocoa and sugars in a medium bowl; stir to combine.
  • Add the whole milk and use a hand mixer on low speed or whisk to combine until the cocoa and sugars are dissolved, about 1 to 2 minutes.
  • Stir in the heavy cream and vanilla. If not freezing immediately, cover and refrigerate until ready to use.
  • Turn machine on; pour mixture into freezer bowl, and let mix until thickened, about 25 to 35 minutes. The ice cream will have a soft, creamy texture.
  • Break up brownies into bite sized pieces and add them, piece by piece into the ice cream.
  • Add peanut butter, by the teaspoon full into the ice cream.
  • Add fudge.
  • Let it mix for another minute or two.
  • If a firmer consistency is desired, transfer the ice cream to an airtight container and place in freezer for about 2 hours.
  • Remove from freezer about 15 minutes before serving
*Directions may vary, depending on what your ice cream maker's instructions.


-Jessica and Leah


Wednesday, 22 August 2012

Poutine


It's been a few weeks! I was off on a lovely little family vacation to Alberta for a family reunion on my hubby's side. Then, we came home and moved. Right away. It's been busy busy busy! It's been a really fun summer, but let me tell you, I am very happy to turn in the camp stove and hot dog roasters and get back to a real kitchen! My new kicthen, which has a gas stove and a convection oven. I know. I can't keep out of there.

 Last week, just after we got settled, Leah and her brood came for a visit so we decided to make an awesome "meal" for the kids. And by the kids I mean we made it for us, and then felt bad and were forced to share.

We are Canadian. I think that may have been mentioned before. There don't seem to be a lot of strictly Canadian foods, seeing as how our great country is relatively new, and really a great  big melting pot. I love it, it's what makes our country so diverse and interesting.

However, there is one food that is pretty much to die for, and 100% Canadian baby. French Canadian. This dish originated in Quebec, and made it's way across the country. It's called Poutine. For those of you south of the border, this is pronounced "Pooh-teen". And it's amazing.

Traditionally, poutine is made with cheese curd, but we used mozzarella instead for 2 reasons. I had some in my fridge already, and cheese curd is hard to find and can be pricey.

You can use whatever cheese you like, depending on how strong of a cheese flavour you want. I think the best are of course the traditional curd, mozzarealla, monterey jack, havarti, or pepperjack.
Try to invite some people over when you make this, because otherwise you might be tempted to eat it all by yourself, which you might regret later. Maybe.

Poutine

6 russet potatoes (I think these make the best fries)
2 tsp fresh minced garlic
salt, to taste
3 tbsp olive oil
1 pack of brown gravy mix
1-2 cups shredded mozzarealla cheese

  • Preheat oven to 450 degrees
  • Wash potatoes and slice into french fry sized strips
  • Put in a large stainless steel bowl and toss with garlic, salt and olive oil
  • Spread on a parchement paper lined baking sheet and pop in oven for 15-20 minutes, until soft and slightly crispy. (I do them less crispy than I would if I were just going to eat them by themself, you will want these ones to be a bit softer, because you eat this with a fork.)
  • In the meantime, while they're in the oven, prepare your gravy according to the instructions on the packet.
  • Grate your cheese.
  • When the fries are done, put them immediately into individual bowls, smother in gravy, and top with cheese. It will melt as you eat it.
  • Try to share, if you have it in you.


-Jessica and Leah


Thursday, 12 July 2012

A little paint goes a long way

Do you love Michaels? I do. And by love I mean LOVE. When I was a kid I thought it was pretty boring, but either Michael's has changed, or I have.  I could spend a whole day (and a whole paycheck) in there.

Yesterday I got a stack of 7 12x12 canvases for 29 bucks. I was pretty excited about it, especially because we're moving in a few weeks and I am excited to do some decorating. The kids too!


The kids bathroom is also the guest bathroom, and so I picked a nice "bluebird" blue paint colour and a white shower curtain. I wanted it to still look fun with a bit of colour, so I let the kids paint some art for the wall in there. This is courtesy of Hayden. It's his Chocha (Auntie) Amanda taking a walk in some flowers.  Not bad for a 3 year old!


This is Oliver, who painted himself (who else?). I'm diggin' the cowboy boots.


They got to share the third canvas and decided on a rainbow. Can't wait to see these up in August!


This one is for the baby's room (ok, he will be one in 3 weeks....how is this happening?! I am still calling him the baby whether he likes it or not).


This too.


I just have a thing for owls.


Now this one I'm excited about. These kids have a wicked awesome grandma who made them a pirate room. Duvet covers, pillows, lampshades, curtains. She even added a treasure chest with chocolate coins inside, a pirate puzzle, and costumes. I will definitely put some pictures up when we've moved.  All we needed was some art for the walls. I had a lot of fun with this one.  


Truth. They do.


I can't wait to get it all up and see it on the walls!


-Jessica

Monday, 2 July 2012

Raspberry Cream Pie


I loooooove raspberries. I think they are superior to strawberries in every way. More flavourful, juicier, bite size. Love 'em. But they do seem to go bad pretty quick. I had a whole bunch to use up and I was fresh out of ideas.

When this happens, I usually wait until inspiration hits, or I call up Leah, because she's usually full of them. Today I founds myself on www.thepioneerwoman.com and let me tell you, that woman is never out of ideas. I just borrowed one of hers.

You can find her recipe here.

It's scrumptious. I  can't remember the last time I used that word, but I like it. It's gonna be a thing.


-Jessica


Wednesday, 27 June 2012

Fresh Pico De Gallo


My dear friend and her husband were recently blessed with a beautiful baby girl. My future daughter-in-law, in fact. Because I said so.

We had a lovely pink baby shower at my house (and let me tell you, it was PINK! I have 3 boys, so I do it when I can). I made this fresh salsa to go on the food table. Not exactly pink, but tomatoes don't come in that colour so I'll settle for red. It was gone faster than the cupcakes (doesn't usually happen). A sweet little 7 year old guest approached me very politely and asked if Iwouldn't mind giving her the recipe because she loved it so much. I believe she'll make it too, this girl loves to cook.

Poor Matt was so sad to discover that it was all eaten, so he ran to the store for another jalapeno so we could do another batch. So, FYI, you might want to double it.

Fresh Pico De Gallo

  • 4 regular sized tomatoes, my fav is on the vine
  • 1 white onion
  • 1 jalapeno pepper
  • 2/3 cup fresh cilantro
  • 2 tsp lime juice
  • salt and pepper

Chop up your tomatoes and onion and put in a big-ish bowl.
USING GLOVES, chop up your jalapeno pepper pretty small and add to the tomatoes and onions. If
    you like the heat, add some of the seeds. I left them out. If you don't use gloves while chopping,
    you could get a nasty acid burn on your fingers. I made this mistake one, it was definitely not fun.
Chop the cilantro, add.
Add some salt and pepper, how ever much you usually like.
Pour in the lime juice.
Mix it all together and serve with tortilla chips!


-Jessica

Tuesday, 26 June 2012

Strawberry Apple Jam


I'm not what one might call a patient person. When I want something, I want it NOW, thank you very much. When I decide I need a haircut, tomorrow is not soon enough. Waiting is agony. Maybe it's because I am the youngest child of 4 and I got sick of waiting for things. Or maybe it's just my personality (likely). Whichever it is, I like things right away. Delayed gratification? Not for me.

I have never made jam before, but a few weeks ago I decided I would like to make my own. My hubby is a sucker for jam, and I thought he might like some fresh. Of course once I got this in my head, I wasn't about to wait until the next day to go pick up some pectin, now was I? Of course not.
This is me, remember?

So I did a little research and found out that apples are full of natural pectin. And I just had some sitting in my fruit bowl. Ha. Now, granny smith's would probably be a little better because strawberries, especially once cooked down are really sweet. But Fuji is what I had, and the jam was fab. So if you're impatient like me and don't have any pectin in your house, this is your jam. If you do have pectin, congratulations on being more organized (and probably more patient) than me, but I'd make this anyway because it's pretty yummy.


Strawberry Apple Jam

  • 3 cups (or so) or sliced, hulled strawberries
  • 1/2 cup granulated sugar (possibly more if you're using a granny smith apple)
  • 1 large apple, peeled, cored, and grated
  • 2 1/2 tsp lemon juice

In a large, heavy duty pot, dump in your apple, berries, and sugar. Cook over medium/low heat for about 20 minutes, stirring every few minutes and breaking up the berries as they soften.

Once the jam has thickened, grab a hand held blender (they are pretty amazing for things like this) and blend until most of the chunks are gone, unless of course you like really chunky jam.

Stir in your lemon juice and transfer into jars. I got one regular and one teeny mason jar full, you could probably get 2 medium out of this. Let chill for about 2 hours before eating.


-Jessica

Monday, 18 June 2012

Lemon Butter Salmon with Spicy Potatoes


I totally got married under false pretenses. I thought I was marrying a terrible cook. On our first date, he couldn't even tell the difference between lettuce and cabbage. I thought I was doomed to a lifetime of cooking myself, or tacos (without lettuce).

Then one morning he made me an omlette. It was amazing. Way better than I could have done in a million years (eggs and I aren't friends). I though, ok, not a great cook, but breakfast he can do.

Then one night, he announced that he was making dinner. He made peppercorn steak with foil-grilled yams, peppers and red onions. Who was this man?

Then one day, he said he wanted to make salmon. Not being a seafood fan, I told him fine but I wasn't going to eat it. Well, let me tell you, that man converted me. He made the best, moistest salmon I have ever had. I don't know what's gotten into him, but I really hope it stays there.


Lemon Butter Salmon with Spicy Potatoes

  • 4 center cut salmon fillets
  • 1-2 lbs baby red potatoes
  • 2 tbsp olive oil
  • 1 head garlic, minced and divided
  • 3 tbsp butter
  • 1  1/2 tsp roasted red pepper flakes (more or less, depending on how spicy you like)
  • juice from 2 lemons
  • salt and pepper
Preheat oven to 350 degrees.
Chop up your potatoes into bite sized pieces and put in large bowl.
Add olive oil, half (or so) of the garlic, red pepper flakes, and salt and pepper (to taste).
Line a baking sheet with tin foil and dump potatoes on.
Bake for about 45 minutes or until soft and crispy.
Once your potatoes are in the oven, line another baking sheet with parchment paper.
Put your salmon fillets on, skin side down.
Salt and pepper your salmon.
Melt the butter and add the rest of the minced garlic.
Using a brush (if you have one) brush garlic butter on top of the fish.
Squeeze lemon juice on top of that, using 1/2 a lemon per fillet.
When the potatoes only have 15 or 20 minutes to go, put your fish in. Salmon is a fatty fish and has a short cooking time.
Remove, and enjoy!


-Jessica


Friday, 15 June 2012

Excitement!

Hello fellow food lovers. We have some exciting happenings going on around here. We are turning our little blog to a real dot com! It's not quite ready yet, but it's getting close and we can't wait! We will continue to post on here for the time being, but keep your eyes open! Thanks for reading!

J and L

Wednesday, 6 June 2012

Cinnamon Bun White Chocolate Rice Krispie Squares


Remember like 15 years ago when they made Rice Krispie treat cereal? I don't know why, but as soon as I found out about this cereal, I knew I had to have it. I begged. In fact, I think my siblings got in on it too. We had to have it. Well, good luck convincing my mom. The answer was no. Not healthy. Too expensive.

One morning, though, we woke up to homemade (that's right, homemade) Rice Krispie treat cereal. My mom had woken up early, made a big batch or Rice Krispie Squares, broke it up into bite size pieces and let us eat it as cereal. It was the best ever. I don't really remember if it actually tasted that good, or if I just thought my mom was the awesomest.

Well, now that Kraft makes these new cinnamon bun marshmallows (I know, right!), how could they not be tasty as Rice Krispie squares? I added some whit chocolate morsels for good measure.

I was actually not going to blog about this, because it's hardly a recipe, but my hubby went crazy for them, and told me that if I didn't post it, he would. So here it is, people. Let's call it breakfast.


Cinnamon Bun White Chocolate Rice Krispie Squares


  • 1/4 cup butter or margarine, melted
  • 1 package (250 grams) cinnamon bun marshmallows
  • 1/2 tsp vanilla
  • 6 cups Rice Krispies
  • 1 cup white chocolate morsels

In microwaveable bowl, melt the butter and marshmallows for 1 minute. Stir, and zap again for 1 more minute, or until the marshmallows are really puffy.

Add the Rice Krispies and mix until combined. Add the white chocolate.

Press into 9x13 casserole dish and leave for at least 15 minutes (if you can wait that long).


-Jessica


Friday, 1 June 2012

Chocolate Zuchinni Muffins


My sister-in-law Emily is a garden queen. She has the world's greenest thumb. I often think about growing a garden in my back yard, but I will pale in comparison. (Although she is coming over to help me plant some tomatoes- let's hope I don't kill them).


One year, her garden exploded zuchinnis. They were everywhere. Literally all of her counter space was taken up by beheamoth zuchinnis. If you didn't know they were home grown, one might believe them to be genetically modified and pumped full of water. There was so much zuchinni, so, naturally some was sent home with me.

I turned some into meals and some into desserts, and in doing so I realized something: Zuchinni is fab. It's good in everything. Throw some into the next spaghetti sauce you make- I promise it won't disappoint. I made a few bread/muffin recipes and decided I liked this one best. It's quite moist with a lot of substance to it, but somehow it's still light feeling. And it's a really sneaky way to get your
I-don't-like-vegetables kids to eat them without turning up their noses.


Chocolate Zuchinni Muffins

recipe can be found here from Our Best Bites


-Jessica


Thursday, 17 May 2012

Ice Cream Cake


I have a confession to make....I'm not really a big fan of cake. Sure, I like it. Of course I'll eat a piece. Obviously I enjoy making it...but I would much rather have a pie. Or ice cream. Or (wait for it) ice cream IN cake. No, INSTEAD of cake, but still in cake form.

Yesterday was my hubby's birthday, and he asked for an ice cream cake instead of regular. I planned to pick one up from DQ (the middle fudge/cookie filling? Come on!) But he said "You know, if you made it yourself, you could use Turtle ice cream, wink wink nudge nudge".

I was a little apprehensive, having never made one before, but people, this was probably on my top 5 list of easiest desserts I have ever made. Just a handful of ingredients and about 10 minutes to put together, let's all get together and have one big giant un-birthday party and have some ice cream. Cake, of course.


Ice Cream Cake


2- 2 litre tubs of ice cream, your flavour (I used turtle and peanut butter rolo)
1 box of oreos (or enough crumbs to make a crust)
3 tbsp melted butter
2 cups coolwhip or 1 cup whipping cream, divided
1 cup chocolate fudge (like the ice cream topping kind)

  • Leave the ice cream on the counter for about an hour until it's nice and soft
  • Preheat oven to 350
  • Crush up your oreos and combine with melted butter
  • Press into bottom of 9 inch spring form pan
  • Bake for 5 minutes
  • Dump one flavour of ice cream onto crush and spread it/mush it down until it's nice and flat
  • Spread cool whip on top of the ice cream, reserving one cup for the top (if using real cream, whip it until soft peaks form and then spread on top of ice cream
  • Pour your hot fudge on top of that
  • Dump the next flavour of ice cream on top, and spead until it's nice and flat again.
  • Freeze for at least 8 hours
  • Put reserved cool whip into a piping bag with a star or flower tip and pipe along the top.
  • Keep in freezer until ready to serve (obviously). Remove side of spring form pan.


*This can be made a few days in advance

-Jessica

Thursday, 10 May 2012

Ginger-Pear Quick Bread


Bread. Ha. As long as you call it bread, it counts as breakfast, right? To be fair, it does contain flour, a main component to bread. And it's baked in a loaf pan. But I definitely wouldn't toast this or make a sandwich out of it. It's pretty much an excuse to eat cake for breakfast.

Fair enough, though, there are pears in it.  Fruit for breakfast. Justified.

My middle guy is the herbivore of the family. His favourite snacks include cucumbers, bell peppers, tomatoes, and pears. The other he asked for a snack. I said he could have whatever he could find in the fruit bowl. I came to check on him about 10 minutes later, and there he was, polishing off a pear. "Good choice", I said to him. Then I looked in the fruit bowl to find a bunch of bananas and some avocados. No pears. I knew there were 3 earlier, and I hadn't eaten any. "Did you eat ALL of them?"
"Yep, mum, I did! Did you know pears are my favourite?" Well, I do now.

We went to Costco and bought the biggest bag we could find. I grabbed 3 before he devoured them all so I could make this "bread". No surprise, he had about 4 slices for breakfast this morning. (This kid could eat a large pizza and still be hungry.) If you have any pear lovers at your house, you should probably make this for them.

Ginger-Pear Quick Bread

3 large, soft pears, peeled, cored and chopped (I used D'Anjou pears)
1/3 cup granulated sugar
1/2 tsp ground ginger
1/2 tsp ground nutmeg
1/3 cup oil
1  1/2 tsp vanilla extract
2 eggs
1 cup all purpose flour
1 tsp baking soda
1/4 tsp baking powder

  • Combine chopped pears with sugar and spices; set aside.
  • Preheat oven to 325 degrees ferenheit.
  • Grease and flour a standard loaf pan (or a few minis)
  • Beat eggs, combine with vanilla and oil and mix with the pears.
  • In a separate bowl, combine flour, baking soda and baking powder and mix in with the wet.
  • Pour into the loaf pan and bake for about 40 minutes or until a knife comes out clean.


-Jessica

Thursday, 3 May 2012

Rocky Road Cookies


Canada-ism number 54: In Canada, "Rocky Road" ice cream is sometimes called "Heavenly Hash".
The only explanation I can come up with for this radical change in name is the fact that Heavenly Hash is a pretty fitting name. Hash, (although usually for breakfast and containing potatoes) refers to a mashed up combination of yumminess. In this case, its heavenly. Just go with it.

Actually, I prefer the name Rocky Road. I feel like it just kind of sells itself- chocolate (the road) with pecans and marshmallows (the rocks). Self explanatory, really.

Okay, so you know those yummy little marshmallows that are sitting on top of all the powder when you buy hot chocolate "with marshmallows"? Kraft had a wave of genius and decided to sell the marshmallows all by themself. They're so good. Like SO good. I love 'em. They were the perfect inspiration for these cookies.

Rocky Road Cookies

3/4 cup sugar
3/4 cup brown sugar
1 cup softened butter
2 tsp vanilla
1 egg
1 tsp baking soda
2  1/4 cup all purpouse flour
1  1/2 cups chocolate chips (I like dark)
3/4 cup chopped pecans
3/4 cup Kraft mini marshmallow bits

  • Preheat oven to 375 degrees ferenhiet
  • Combine sugars, butter and egg in your mixer using cookie paddles
  • Add vanilla
  • Add flour and baking soda until combined
  • Add chocolate chips, pecans, and marshmallows
  • Drop by rounded spoonfulls onto a cookie sheet and flatten a little with your palm
  • Bake for 8 minutes, or until very lightly browned on top
  • Remove from oven and cool on wire rack


-Jessica


Wednesday, 2 May 2012

Raspberry maple cream crepe cake


I really love mothers day.  I have some really awesome kids that make me proud to be a mom. I know it's still a couple of weeks away, but once May hits, I start thinking about my mom a bit more that I do the rest of the year. Our mom passed away several years ago- I was a young mother myself, Jessica was still a teenager.  And the memories of her are bittersweet. Bitter, because they're only memories, but sweet because our mom was awesome. Seriously awesome. I know I'm a tad biased, but trust me she rocked! This is a picture of her.

See? Can't you tell just by looking? That face just screams of wonderfulness. (is that a word?)


Anyway, one of my favourite memories of my mom is eating crepes and playing one of our favourite board games, Mensch argere dich nicht. (It's a German game that is really alot like "Sorry!", but since the game isn't all kiddie, you can still feel like a grown-up playing it). It was a great way to procrastinate in the morning.

So, with mothers day "crepe-ing" up on us (get it?), I wanted to make some crepes, that my mom would've loved. But who doesn't also love cake? For breakfast? Made of breakfast? But it's still actually breakfast.....uh....anyway.....
looks yum, right?


well, my little guy thinks it looks good. He's so patient.


Just look at the gooey yummy inside.
You can make it too! You could even share it with your mom, and play board games! (or eat it yourself, which I also highly recommend.)

Here's how:


Crepes:
2 eggs
1 cup milk
1 Tbsp. butter (melted)
1 tsp. vanilla
1 Tbsp. sugar
3/4 cup flour
pinch of salt

Beat together eggs, milk, butter, vanilla and sugar until smooth. Add flour and salt. Continue to beat until smooth. 
Lightly spray your pan with olive oil, and pour batter into frying pan. (I used about 1/4 cup of batter for a 9" pan.) Slowly rotate pan allowing batter to spread evenly on bottom of pan.  Let cook about 2 minutes, (med. heat) until crepe can be flipped without ripping.  Cook opposite side about 30 seconds. Repeat until they're all done. I got about 10 crepes, but it depends on what size pan you use. 

WARNING!: You're kitchen will smell like freshly baked waffle cones!!! (not a bad thing)

Raspberry filling:
I cheated and used a jar of raspberry pie filling.
Spread a layer of filling on every 3 crepes.


Maple cream "frosting"

1 cup heavy cream
2 Tbsp. sugar
3 Tbsp. 100% pure maple syrup

Combine all 3 ingredients in bowl and beat with hand mixer until smooth and creamy, but not yet forming peaks. 
* I really prefer a hand mixer for whipping cream. I feel like I have more control over the consistency. 

Top with fresh raspberries and drizzle with maple syrup.

Enjoy!


Okay, so the thing is I really like pure maple syrup. But you can do what you want. If you don't like as much, or any, add less, or none. Maybe you don't care for raspberries...use peaches, blueberries, or heck, beets if you want. What you like is up to you.

-Leah